
Patient Check-In Process for MAPs
When a patient schedules a specimen collection at your MAP, you will receive an email notification prompting you to visit the portal and view your queue.
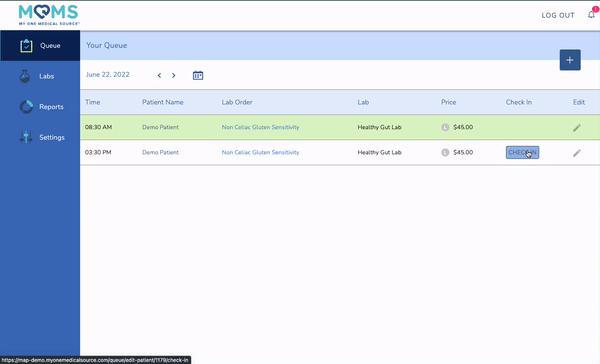
Once on the portal, you will see the schedule of patients for the day. You can change the date to see future appointments or past appointments. For new appointments, you will notice a “CHECK IN” button.
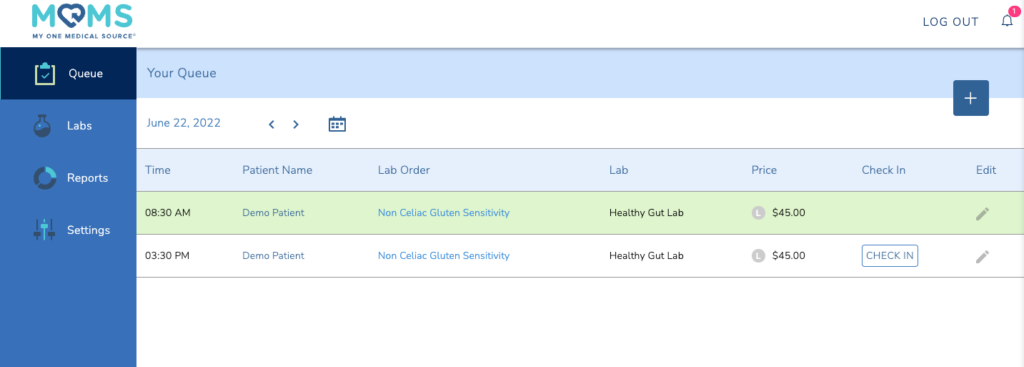
In order for the collection to register within the system, you must check the patient in when they come for their collection.
Upon doing so, you will be directed to the Patient Check-In page. Here, you will see the ordering lab, the requested lab order, optional physician information, and the patient information during the scheduling process. Once you confirm the information, click “Check-In” at the bottom to complete the process.
You will be redirected back to the patient queue and will see that the line item has turned green, officially registering the collection in the MOMS platform. The payment on file will be charged, and you will earn revenue for the collection at the end of the month, less any relevant platform transaction fees.
If you forget to check the patient in, you can go back to the date of the appointment and do so. However, without checking the patient in, you will not be paid for performing the collection. Other than the collection itself, this is the most important part of the process.
To confirm the patient(s) have been checked in, you can click through the dates of the queue to look make sure the line items are green. Additionally, you can check the Reports menu to see which patients have been drawn, for which lab, and when.
If you need a platform overview for new staff or a refresher, you can schedule one here or by emailing training@myonemedicalsource.com.